The primary capability of Geopointe is to get your Salesforce data on the map! But, if you’re unfamiliar with or just starting out with Geopointe, you might not know where to start to actually GET your data on the map. We’re here to help!
When using Geopointe within Salesforce you will find four simple ways to search the map. While you can create additional layers on these maps to build sophisticated, information-rich maps, we’re just going to stick with the basics for now.
The four ways Geopointe allows you to search are:
- Nearby Search
- Shape Search
- Map View Search
- Everywhere Search
Prior to mapping any data on Geopointe you will first need to create data sets. “What are data sets?” you ask? Simply put, a data set is the data you would like to pull from Salesforce and place on your map. This could be data from an Account, Contact or Opportunity as well as any custom objects that have been set up for your Salesforce instance.
Let’s use the following data set as an example for this article:
All Contacts whose: Customer Type = “Prospect”, employee size = 250+, estimated Annual Recurring Revenue (ARR) = $10,000+ and have not been contacted
Nearby Search
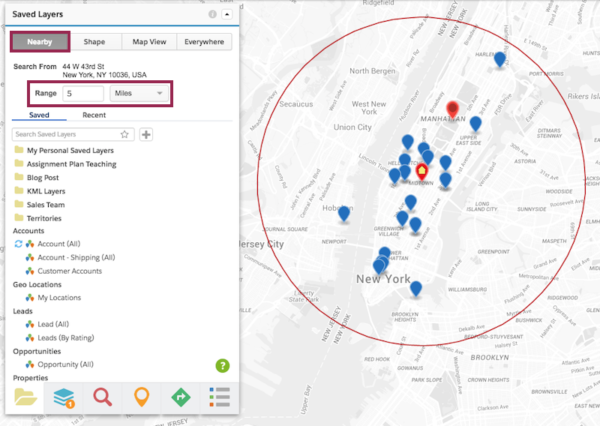
Now we’re ready to search the map, let’s start with a Nearby Search. Nearby Searches allow you to pick a location on the map and choose to search within a specific radius either by miles/kilometers, minutes driving, hours driving, miles driving or kilometers driving.
While these searches are great for anyone who is out in the field for a meeting or visit and wants to see who else might be near that location so they can set up a meeting, there a multitude of ways they can be utilized.
For our Nearby Search example let’s say you are planning to meet with a customer in Chicago, Illinois, and you’d like to see if there are any individuals to meet who match your above data set within a 20 minute drive. You will first enter the address of the customer you are planning to meet within the Search Bar on the map and then choose to search within a five mile radius using that data set we set up (see above).
If you find that you don’t have enough results, you can just re-adjust the distance and search again! If you have too many results, you can add in additional layers of data sets to fine-tune the search.
Shape Search
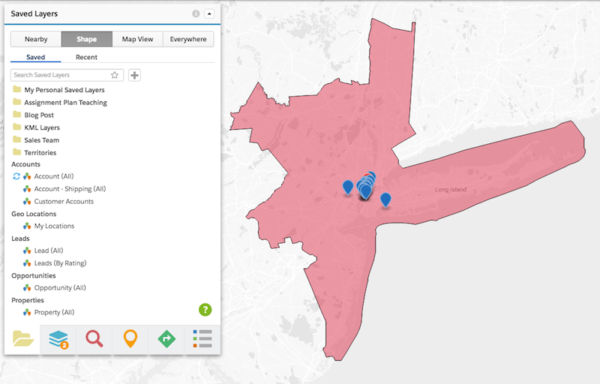
Next let’s look at Shape Searches. Geopointe provides users with a built-in Shape Library which allows you to choose from shapes based on cities, states, countries, ZIP codes, counties and a variety of additional options. You can also create your own custom shapes to have available.
But what kind of shapes would you draw? Great question! One of the most popular instances of custom shapes is to create shapes of a teams’ individual territories. You can place the shape that encompasses your territory on the map and then, once again using the data set we outlined above, search for prospects that fit that criteria within your territory.
Maybe you’re looking to schedule some face-to-face meetings or you want to make some phone calls or you’d like to start sending off some emails. The results of a Shape Search will be able to give you the Salesforce data you’re looking for in that pre-defined area. Then, you can easily add that information to a route, add it to a campaign, update fields, change ownership or even export to a CSV/Excel or KML for use outside of Salesforce.
Map View Search
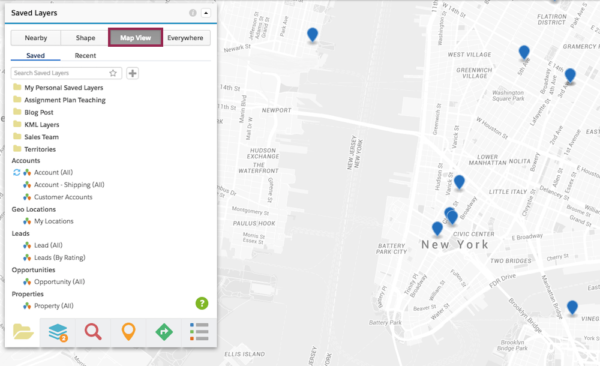
Now let’s move on over to the Map View Searches. A Map View Search is a great way to search when you want to search near an area but don’t necessarily have a specific radius/distance you need to stick to. Or, in some cases, maybe you’re not sure what that radius is.
Let’s clear that up with an example. You are taking a trip to New York City to meet with a few customers who are in and around the city. You’d like to see if you have any prospects that fall within our previously created data set in or near New York City. Since you have some flexibility with your schedule you don’t have a specific radius you want to search within, an ideal scenario for a Map View Search.
The first step would be, similar to your Nearby Search, to enter in “New York City, New York” in the Search Bar. Once New York City appears on your map you can either zoom in, zoom out or leave as is. The area you see on your map is the area Geopointe will search within when conducting a Map View Search. Your search will not extend beyond what is visible on your screen.
Once your data appears on the map you will be able to see where prospects fall within your selected data set are located. Again, you always have the option to adjust the map if you are not finding the results you want. You can adjust your map view (zoom in, zoom out, drag to the right/left/up/down) and re-run your data set.
Everywhere Search
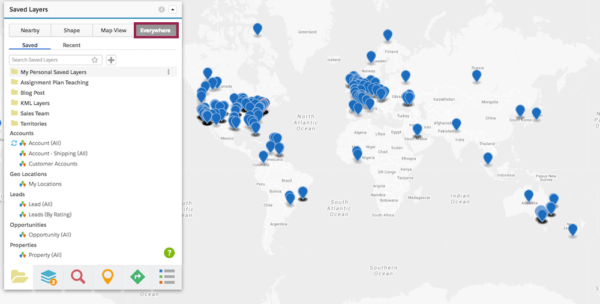
You’ve made it to our last search type, Everywhere Search! The Everywhere Search is exactly what it sounds like, it will search everywhere in the world for the data set you are running.
If your company does business in multiple countries the Everywhere Search can be great for providing valuable insights into things like where your most growth potential is, what region is performing the best, etc.
If you have additional questions regarding the different types of searches Geopointe can offer or any other benefits Geopointe may be able to provide your organization, just click below to submit your request for a demo. Our team would be happy to reach out to help!


