When you installed Geopointe, you probably saw it and wondered what it was. There’s a Map Object for it. And there’s a Data Set for it. And there’s a tab for it. But what are Geo Locations?
Geo Locations are where saved locations created on the Map Page go, or where you can save addresses that don’t correlate to Salesforce data. For example, let’s say there’s a particular location that you A) visit frequently or B) start your work day from or C) finish your day at. If you’re creating routes for your day-to-day, you’ll want to have that location stored and easily accessible.
There are a few ways you can add a location to Geo Locations. I’ll touch on those here and then show you how to recall them later.
By Address on the Map
To add a Geo Location by its address on the Map page, go to the Search Places & Data tab. Enter in your address with the Address radio button selected and click search. I opted for a location where I find myself frequently at the end of a work day:
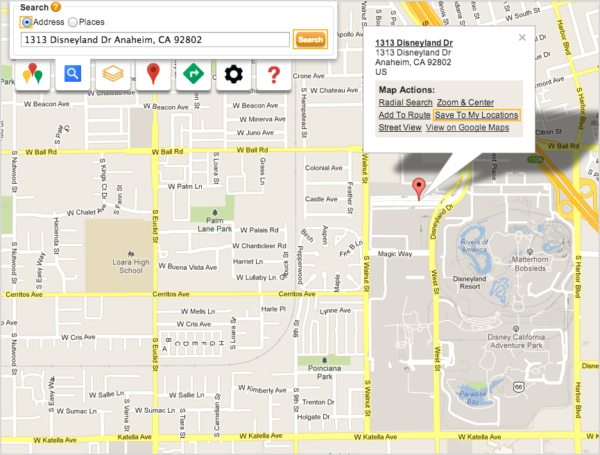
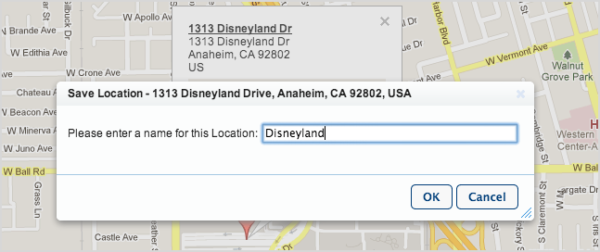
As you can see, the bubble attached to the pin on the map includes a link to “Save to My Locations.” Click that, give the location a name, and you’ve created a Geo Location.
Right Click on the Map
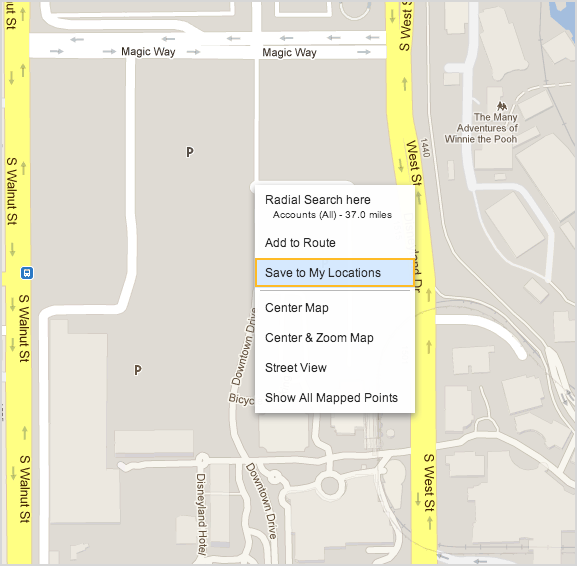
Sometimes an address isn’t quite what you need, and you can be more precise by locating it on the map yourself. For example, if I go to the resort after work, I’m likely parking in the Downtown Disney lot, so it would be worth my time to have the directions go there, rather than the theme park main office. If you right click on the map, you also get the option to “Save to My Locations.”
By Address on the Geo Locations Tab
You can also add a Geo Location manually on Geo Locations tab itself, in a fashion much more like you’re used to when adding information in Salesforce. If you visit the tab (it should be available under the Geopointe app or by clicking the + sign), you can click new at the top of the list.
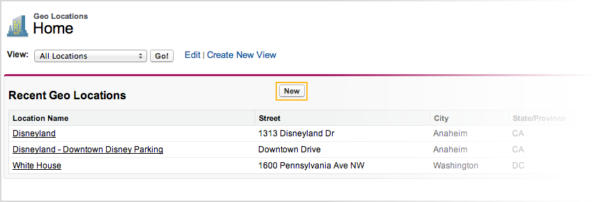
You can enter an address or lat/long values (the lat/longs are not required). Complete the information and click save.

Recalling a Geo Location
There are two ways to view a Geo Location on the map after it’s been saved into your system. The first, and probably the one you will use the most, is on the map. If you go back to the Map page and select the My Places & Locations tab, you’ll see a list of your saved locations. You can see its name and address. Your available actions are to center the map there, add it to a route, or delete it if you no longer need it.

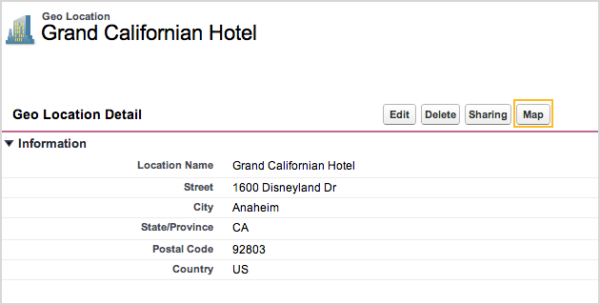
Finally, you can center the map on a Geo Location from a Geo Location record itself, just like you would from another Salesforce record, using the Map button.
I hope this Geo Locations overview helps you understand how you can utilize them! And help solve the mystery of that default Object that sits there without knowing what it does.

